Oral Sessions Instructions
Guide to Uploading Your Files
Step one. There is an entry for each session in the library.
On the PAA 2020 Oral Sessions Page, find your session using the filters on the right-hand side:

Step two. When you locate your session, click the green “View” button.
Confirm this is your session. To start the upload process, click the blue “Actions” button, dropdown to click “Edit.”

You will see your session details pre-populated in the fields. Verify this is correct. Please do not remove the #tags. Click the blue “Next” button.

Next, you will click “Choose and Upload” to find the files you would like to include in your session.

You can upload multiple files at one time. Select them from your device, drag and drop them, or input a hyperlink. When you have them selected, click the blue “Upload” button at the bottom.

Click the blue “Next” button. (Or the small trash can if you need to delete!)
On the Describe Your Files screen, enter a title here. If you do not enter a title, the filename will show as is. For the description, enter your Abstract. This will appear below the filename.
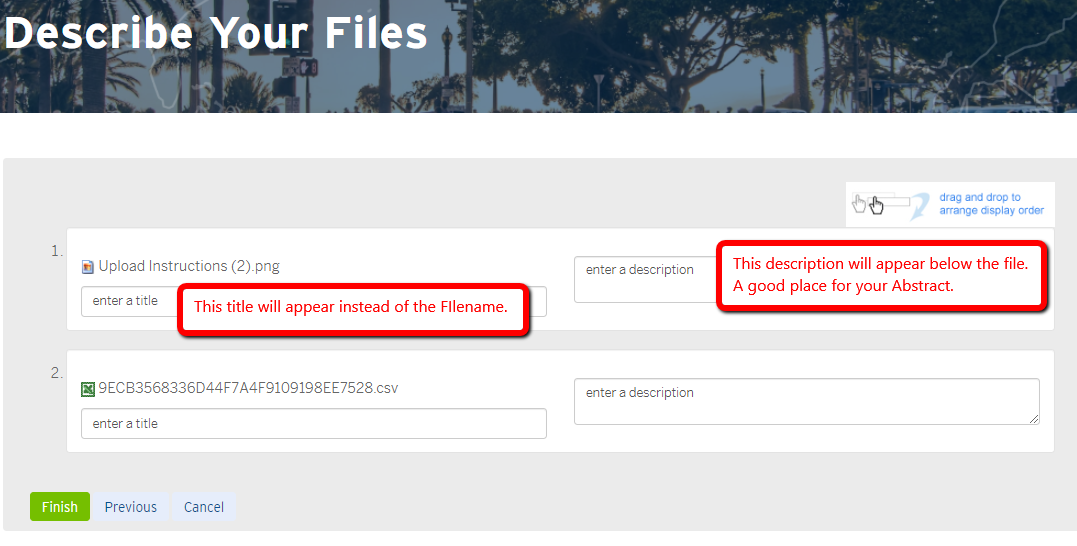
Then click the green “Finish” button.
Final step.
Related Entries offers you an opportunity to link more material to your session.
If you would like to add other hyperlinks to your session, for example a link to your website or your research program’s website, or a YouTube presentation, you can add them via Related Entries.
Permalink offers you a permanent web address URL to your session.
Questions? E-mail us at paa2020@popassoc.org.